About Weapon Enchantments Pack
Introduction
System Overview
Installation (Oxide/uMod & Carbon)
Configuration Guide
Commands Reference
Permissions System
1. Introduction
Welcome to Weapon Enchantments Pack, a professional-grade weapon enchantment system designed for Rust servers that require full control over progression, balance, and monetization.
What Is Weapon Enchantments Pack?
Weapon Enchantments Pack is a fully configurable enchantment framework that stores all enchantment data directly on weapon items. This architecture removes the need for world entities, background scanning, or wipe-sensitive databases, making it ideal for long-term wipes and high-population servers.
Key Features
Complete weapon coverage (all Rust weapon categories).
Physical enchant books (store- and kit-friendly).
Custom Forge UI for player progression.
Permission-driven VIP and tiered access.
Store-safe, performance-focused design (no entity scanning / polling loops).
Fully configurable — no fixed balance values locked behind code.
Who Should Use This Pack?
Monetized servers with web stores or donation systems.
VIP-based progression servers.
Long-term wipe servers (monthly or longer).
PvP-focused servers.
Vanilla+ servers seeking controlled progression.
2. System Overview
Plugin Structure
Weapon Enchantments Pack consists of two plugins that work together:
EnchantCore.cs Core framework: registry, item storage, Forge UI, enchanting tables, and book handling.
EnchantWeapons.cs Weapon-specific logic and default enchantments (requires EnchantCore)
Data Storage Model
All enchantment data is stored directly on the item instance. This ensures:
No wipe-sensitive external databases are required.
Enchantments persist through plugin reloads.
No performance impact from entity scanning or polling loops.
Enchanted items can be traded without losing enchantments.
3. Installation (Oxide/uMod & Carbon)
Prerequisites
Rust server running Oxide/uMod or Carbon.
Access to server file system (FTP or panel).
Ability to reload plugins or restart the server.
Install Steps
Upload both plugin files:
EnchantCore.cs
EnchantWeapons.cs
Oxide/uMod:
oxide/plugins/EnchantCore.cs
oxide/plugins/EnchantWeapons.cs
Carbon:
carbon/plugins/EnchantCore.cs
carbon/plugins/EnchantWeapons.cs
Loading / Reloading
Plugins compile automatically on upload. You can also load/reload manually:
Oxide/uMod console:
o.reload EnchantCore
o.reload EnchantWeapons
Carbon console:
c.reload EnchantCore
c.reload EnchantWeapons
Verify Installation
Check server console for successful load messages (version text may vary by build):
Loaded plugin EnchantCore v1.0.0 by hionet.com
Loaded plugin EnchantWeapons v1.0.0 by hionet.com
Quick Test Commands
Give yourself an Enchanting Table and a test book:
enchantcore.givetable YourName 1
enchantcore.givebook YourName sharpness 1 1
Then as server admin (ownerid <YourSteamID> ) run:
/forge
4. Configuration Guide
Weapon Enchantments Pack uses two configuration files. Both Oxide/uMod and Carbon use the same JSON structure, but the config paths differ.
Config File Paths
Oxide/uMod:
oxide/configs/EnchantCore.json
oxide/configs/EnchantWeapons.json
Carbon:
carbon/configs/EnchantCore.json
carbon/configs/EnchantWeapons.json
EnchantCore.json config file explanation
General Settings
"Config Version": 1 - Internal version used for safe upgrades. Do not change this manually.
"Command Prefix": "enchant" - Controls the admin chat command prefix. Useful if another plugin already uses /enchant
Enchanting Table Settings
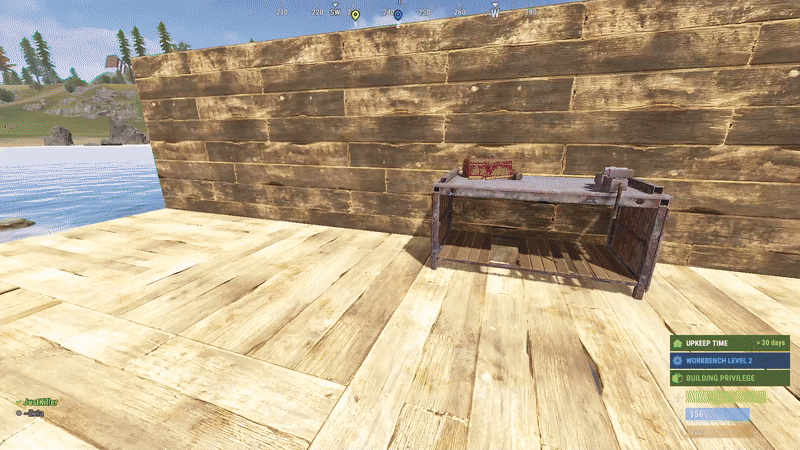
"Enchanting Table": {
  "Entity Shortname": "box.repair.bench",
  "Skin ID": 3653802947,
  "Open Forge By Default": true
}
Entity Shortname - Base Rust entity used as the table, default: box.repair.bench
Skin ID (IMPORTANT) - Required skin to identify the table. Prevents normal repair benches from becoming enchanting tables. Only benches with this skin will open the Forge.
Open Forge By Default:
UI Settings (Forge Appearance)
"UI Settings": {
  "Panel Background Color": "0.1 0.1 0.1 0.95",
  "Accent Color": "0.4 0.2 0.8 1.0",
  ...
}
These settings control visual appearance only.
Rarity Colors (Hex)
"Rarity Colors (Hex)": {
  "Common": "#B0B8C2",
  "Uncommon": "#2ECC71",
  "Rare": "#3498DB",
  "Epic": "#9B59B6",
  "Legendary": "#F39C12"
}
Used for:
Forge UI
Book display
Weapon tooltip text
If an enchant rarity has no color, it uses:
Display Settings (Item Text)
"Display Settings": {
  "Enchant Prefix": "[E]",
  "Enchant Suffix": "",
  "Separator": ", "
}
Controls how enchantments appear on weapons.
Example output:
[E] Sharpness III, Lifesteal II
Performance Settings (IMPORTANT)
"Performance Settings": {
  "Cache Permission Results": true,
  "Cache Item Applicability Results": true,
  "Max Enchantments Per Item (Default)": 3,
  "Purge Unknown Enchantments": true,
  "Purge Unknown Delay Seconds": 300
}
These settings keep the plugin safe for high-pop servers.
Cache Permission Results
Cache Item Applicability Results
Max Enchantments Per Item (Default)
Purge Unknown Enchantments
Purge Unknown Delay Seconds
Loot Books System (Optional LootTable Books inject system)
"Loot Books": {
  "Enabled": false,
  ...
}
This system injects enchant books into loot containers.
Loot Injection Controls
"Max Container Capacity": 36,
"Replace Random Item If Full": true
"Refresh Existing Containers On Load": true
Containers
"Containers": {
  "crate_normal": {
    "Chance": 0.05,
    "Min": 0,
    "Max": 1,
    "Pool": "default"
  }
}
Explanation:
Chance: Spawn probability (0.05 = 5%)
Min / Max: Number of books spawned
Pool: Which enchant pool to use
Pools (Balance Control)
"Pools": {
  "default": {
    "Rarity Weights": {
      "Common": 60.0,
      "Uncommon": 30.0,
      "Rare": 9.0,
      "Epic": 1.0
    },
    "Min Level": 1,
    "Max Level (0 = enchant max)": 0
  }
}
Pools control what kind of books drop.
Rarity Weights
Min / Max Level
Controls enchant level range
0 = use the enchant’s configured max level
 This is your main anti-pay-to-win lever.
Recommended Defaults (Best Practice)
For monetized servers:
For survival / grind servers:
EnchantWeapons.json config file explanation
This section explains the major sections of the EnchantWeapons configuration file and how it affects weapon balance, VIP tiers, book progression, and compatibility.
Global Settings
"Global Settings": {
  "Default Book Item": "documents",
  "Default Book Skin": 3653712312,
  "Max Enchants Per Item (Default)": 3,
  "VIP Max Enchants": {
    "enchantweapons.vip": 4,
    "enchantweapons.elite": 5
  },
  "Combine Success Rates": {
    "1": 100,
    "2": 85,
    "3": 65,
    "4": 40,
    "5": 25
  },
  "Electric Hit Effect": "...",
  "Electric Chain Effect": "...",
  "AOE Center Effect": "...",
  "AOE Target Effect": ""
}
Default Book Item
"Default Book Item": "documents" - The default Rust item used as enchant books. Most servers use documents because it’s common and visually “book-like”.
"Default Book Skin": 3653712312 - Skin ID applied to enchant books. This is important for consistency and presentation (store / kits).
"Max Enchants Per Item (Default)": 3 - Base maximum number of enchantments allowed on a weapon for players without VIP permissions.
"VIP Max Enchants": {
  "enchantweapons.vip": 4,
  "enchantweapons.elite": 5,
  "enchantweapons.customname": 10
}
This is how you create VIP tiers safely.
If a player has enchantweapons.vip, they can have 4 enchants on a weapon
If a player has enchantweapons.customname, they can have 10 enchants on a weapon
Combine Success Rates
"Combine Success Rates": {
  "1": 100,
  "2": 85,
  "3": 65,
  "4": 40,
  "5": 25
}
Controls the success chance (%) when combining or upgrading books to produce the result level.
Example:
This is your main “progression speed” lever.
Lower rates = grind + scarcity. Higher rates = casual / fast progression.
Effect Prefabs (Visuals Only)
"Electric Hit Effect": "assets/...",
"Electric Chain Effect": "assets/...",
"AOE Center Effect": "assets/...",
"AOE Target Effect": ""
These define the visual effects used for specific enchant types.
Changing these does not change damage or mechanics — it only changes visuals.
If AOE Target Effect is empty, no “target FX” will play.
Enchantments
"Enchantments": {
  "sharpness": { ... },
  "lifesteal": { ... },
  "critical": { ... }
}
This is the heart of the plugin.
Each enchantment is a dictionary entry:
Enchantment Definition Fields
Example structure:
"sharpness": {
  "Name": "Sharpness",
  "Description": "Increases all damage dealt",
  "Max Level": 5,
  "Book Item": "documents",
  "Book Skin": 3653712312,
  "Permission": "",
  "Rarity": "Common",
  "Applies To": [ "all_weapons" ],
  "Conflicts With": [],
  "Target Types": [ "all" ],
  "Conditions": null,
  "Levels": [ ... ]
}
Name / Description
Max Level
Maximum level this enchantment can reach.
Also defines how far upgrades can go.
Should match the number of entries you provide in Levels.
 Common mistake: setting Max Level to 5 but only defining 3 Levels.
Book Item / Book Skin
Overrides the global defaults for this enchant only.
Use this when you want:
Permission (VIP/Store Lock)
Example:
"Permission": ""
"Permission": "enchantweapons.legendary"
This is the cleanest way to create VIP-exclusive or store-tier enchantments without giving admin access.
Rarity
"Rarity": "Common"
Used for:
UI rarity colors (from EnchantCore UI settings)
Loot book weighting (if EnchantCore Loot Books is enabled)
Rarity does not automatically balance anything — it’s a classification.
Applies To (Weapon Compatibility)
"Applies To": [ "ranged", "bows" ]
Controls which weapons can receive the enchant.
Usually you reference categories from Weapon Categories:
melee
ranged
snipers
shotguns
bows
launchers
all_weapons
Conflicts With
"Conflicts With": [ "frost" ]
Prevents incompatible enchants from being placed on the same weapon.
Example:
This is critical for balance and prevents “stack abuse”.
Target Types
"Target Types": [ "living" ]
Defines what the enchant can affect.
Common values:
all
player
animal
scientist
npc
living
building
vehicle
helicopter
bradley
deployable
Example use:
Conditions (Optional Extra Rules)
The Conditions block allows you to restrict when an enchant is allowed to activate.
All conditions are optional — if a condition is not set (or set to zero / empty), it is ignored.
Conditions are evaluated after TriggerChance succeeds. (check Levels for TriggerChance)
"Conditions": {
  "HeadshotOnly": false,
  "TargetHealthBelow": 0.30,
  "TargetHealthAbove": 0.0,
  "DistanceBelow": 0.0,
  "DistanceAbove": 0.0,
  "TimeOfDay": ""
}
You can use one, multiple, or none of these conditions together.
All enabled conditions must pass for the enchant to trigger.
Examples:
HeadshotOnly - The enchant will only trigger on headshots
TargetHealthBelow - The enchant only triggers if the target’s current health percentage is below this value. (0.30 = target below 30% HP)
TargetHealthAbove - The enchant only triggers if the target’s current health percentage is above this value. (0.50 = target above 50% HP)
DistanceBelow - The enchant only triggers if the distance between attacker and target is below this value (in meters).
DistanceAbove - The enchant only triggers if the attacker is farther than this distance from the target.
TimeOfDay - Restricts the enchant to a specific time of day. ("day" , "night" )
Using TargetHealthBelow + TargetHealthAbove Together
You can combine both to define a health window.
"TargetHealthBelow": 0.60,
"TargetHealthAbove": 0.30
Enchant only triggers when target is between 30% and 60% HP
DistanceBelow + DistanceAbove Together
You can define a distance band.
"DistanceAbove": 10.0,
"DistanceBelow": 50.0
Enchant triggers only between 10m and 50m
Levels (How Enchant Power Is Defined)
The Levels section defines what an enchant does and how strong it is at each level.
"Levels": [
  { "DamageMultiplier": 1.1 },
  { "DamageMultiplier": 1.2 }
]
How this works:
IMPORTANT
If Max Level is 5, you must define 5 level entries.
How Level Effects Work
Each level is a list of effects
Any effect you don’t define is ignored
Any effect set to 0 is disabled
Multiple effects can be combined in one level
Effects only activate if:
Most Common Effects and Examples
Damage Bonus (Always On)
{ "DamageMultiplier": 1.20 }
Increases all damage
1.20 = +20% damage
Best for simple enchants
Chance-Based Damage
{
  "DamageMultiplier": 1.50,
  "TriggerChance": 0.25,
  "Cooldown": 2.0
}
Critical Strike
{
  "CritMultiplier": 1.75,
  "TriggerChance": 0.15,
  "Cooldown": 1.0
}
Lifesteal
{
  "Lifesteal": 0.10,
  "TriggerChance": 0.30,
  "Cooldown": 2.0
}
Lifesteal With Cooldown and 2 Levels
"Levels": [
  {
    "Lifesteal": 0.10, "TriggerChance": 0.30, "Cooldown": 2.0 // this is Level 1
  },
  {
    "Lifesteal": 0.15, "TriggerChance": 0.35, "Cooldown": 2.0 // this is Level 2
  }
]
DamageMultiplier
FlatDamage
CritMultiplier
ArmorPierce
Lifesteal
FlatHeal
RegenAmount
HealFromDamageMultiplier
BurnDamage
PoisonDamage
ColdDamage
BleedDamage
RadiationDamage
KnockbackForce
NoSprintDuration
Radius
ElectricDamage
ChainRadius
ChainMaxTargets
DurabilityBonus
Mending
AmmoSave
LootBonus
TriggerChance
Cooldown
Duration
HydrationDrain
CaloriesDrain
WetnessAdd
ComfortReduce
Weapon Categories
"Weapon Categories": {
  "melee": [ "salvaged.sword", "machete", ... ],
  "ranged": [ "rifle.ak", "pistol.python", ... ]
}
This section maps category names to Rust item shortnames.
Why it exists:
Makes configs clean and readable
Lets you balance entire weapon groups easily
Prevents copy/paste errors across enchants
To add more weapons:
Add their shortname into the correct category
Or create your own category and reference it from Applies To
Common mistake: spelling shortnames wrong → enchant will never apply.
5. Commands Reference
Admin Chat Commands
Admin command prefix is configurable (default: /enchant). These commands are restricted to BasePlayer.IsAdmin (not permission-based).
/enchant (shows help)
/enchant give
/enchant apply
/enchant remove
/enchant list
/enchant info
/enchant inspect
Console / RCON Commands
enchantcore.givebook <player> <enchant_id> <level> [amount]
enchantcore.givetable <player> [amount] [skinId]
6. Permissions System
Core Permissions
VIP Enchant Limits
VIP enchant limits are configured in EnchantWeapons.json under "VIP Max Enchants". Example defaults:
No permission: 3 enchants per weapon
enchantweapons.vip: 4 enchants per weapon
enchantweapons.elite: 5 enchants per weapon
Per-Enchant Permissions
Each enchant definition supports an optional Permission field.
If set, a player must have that permission to use/apply/combine/upgrade that enchant. This is the recommended method for VIP-exclusive or store-tier enchantments.